Video camera basics
Contents
CU Students – book the equipment here:
https://lorensbergs.coventry.ac.uk/connect2/
Exposure triangle
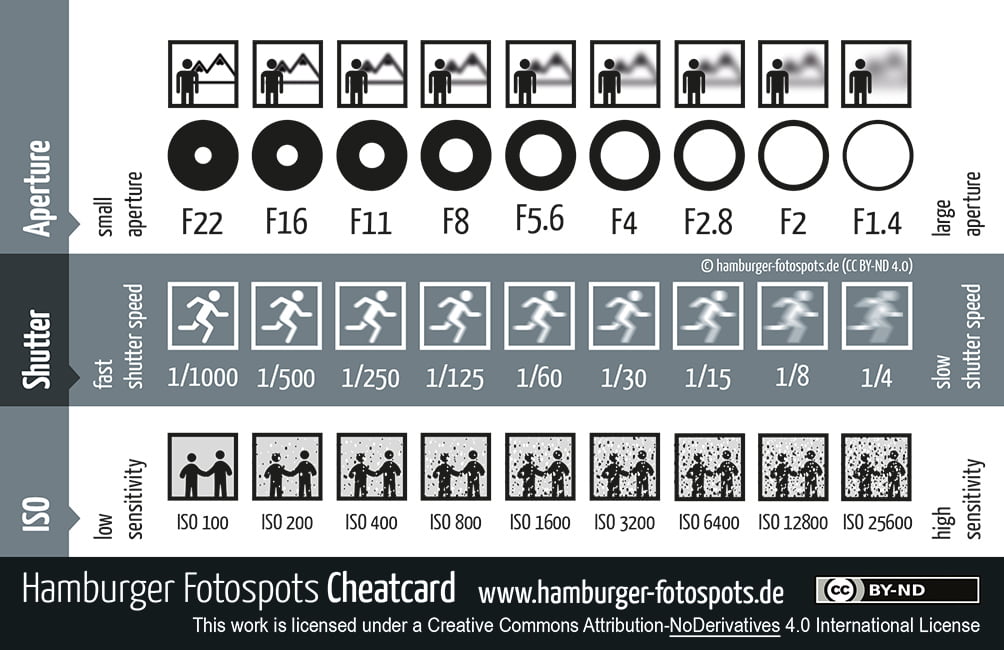
APERTURE (F-STOP)
The size of the opening that lets the light into your camera. It works similarly to the iris in our eyes.
Higher f-stop = f/22 (smaller opening)
- Great for landscapes & large groups of people.
- The higher the f-stop number, the smaller the aperture opening (less light gets through).
- Effect on Depth of Field: Crisper background, “broader” depth of field, more objects in focus.
Lower f-stop = f/1.4 – f/2.8 (wide open)
- Great for portraits.
- The lower the f-stop number, the bigger the aperture opening (more light gets through).
- Effect on Depth of Field: Blurrier background, “shallower” depth of field, so the subject is emphasised.
SHUTTER SPEED
This is not relevant in video cameras as it is controlled by frame rate
How fast the shutter opens. Shutter speed is responsible for changing the brightness of your photo as well as creating dramatic effects by either freezing action or allowing moving objects to appear blurred.
Fast shutter speeds = 1/1600th second
- Fast shutter speeds freeze motion, keeping everything in sharp focus regardless if the object is moving.
Slow shutter speeds = 1/30th second
- Slow shutter speeds leave the shutter open longer, so moving objects appear blurred. This can create a sense of motion on rivers and waterfalls, for example, while keeping everything else completely sharp.
ISO
ISO is the digital camera sensor’s sensitivity to light. In the days of film, it used to be the sensitivity the actual film had to light. As you increase your ISO number, your photos will grow progressively brighter. Changing your ISO helps you to capture images in darker environments or have more flexibility with your aperture and shutter speed settings.
ISO of 3200+
- More grain, more sensitive to light. Best to use in darker environments.
- Caution: Sometimes photos taken with a higher ISO can be grainy and pixelated looking.
ISO of 100
- Less grain, less sensitive to light. Best to use in brighter environments.
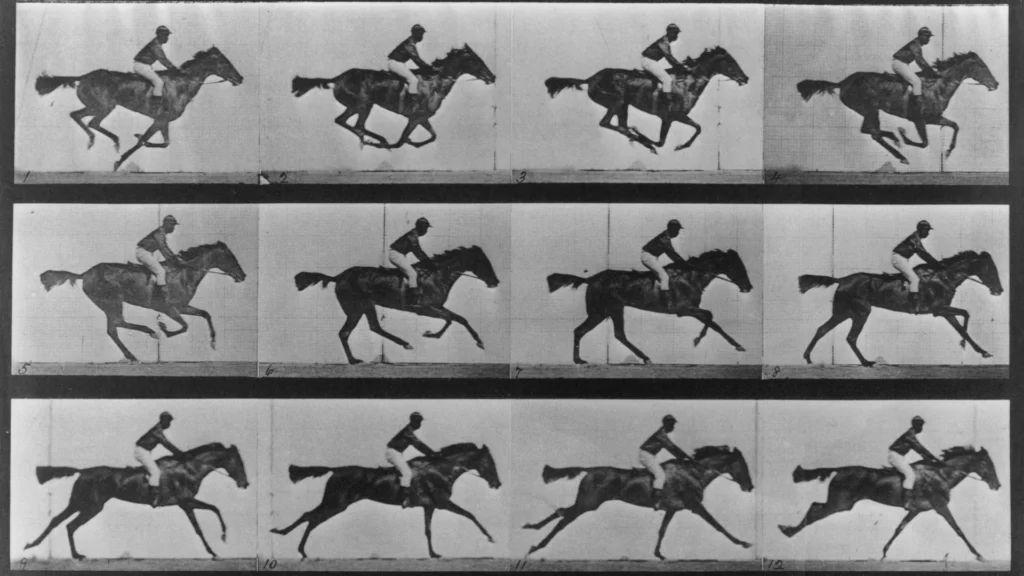
Frame Rates
Please note: These are the standards, not the rule! Frame rates can vary depending on what you are shooting!
Frame rates refer to how many images appear per second to trick the eye into believing you are seeing a moving sequence. In the below Gif there is a counter in the bottom left hand corner signifying 15 images. These images were shot by Eadweard Muybridge to prove all four hooves leave the floor when a horse is in canter.
On the right below the break down can be seen of the images, which when played quickly trick us into thinking it is moving.
So why choose 25 frames per second? (FPS)
As an example British TV is 25/24 fps and this is believed to be the frame rate which most closely mirrors what our eyes capture in real life. The frames when recorded will slightly blur on fast motion.
In comparison, American TV is 30/29.97 fps, and this is often viewed to be smoother as each frame is captured more clearly.
So let’s watch an example of the difference between the two:
British TV = 25fps (50Hz) or sometimes as 24fps
American TV = 30fps (60Hz) or sometimes as 29.97fps
Common mistakes
Which leads us to…..
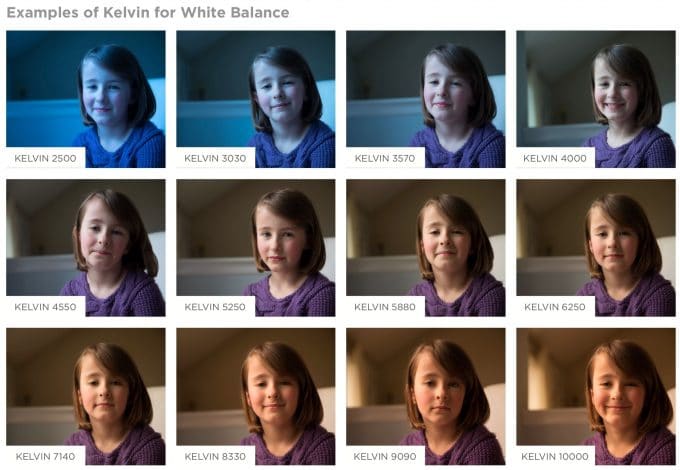
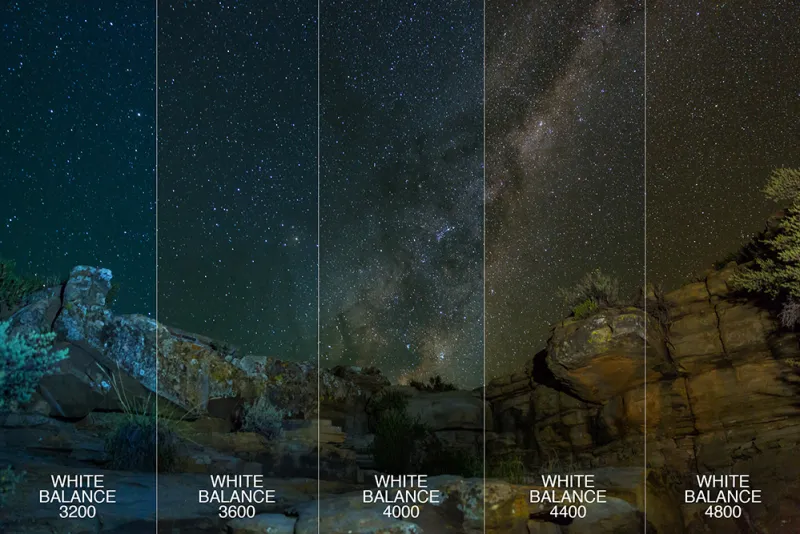
White balance
White balance is the level of white or yellow light in the shot, and can create quite dramatic effects depending on the amount used:
Getting a good shot – tips
Camera work in horror
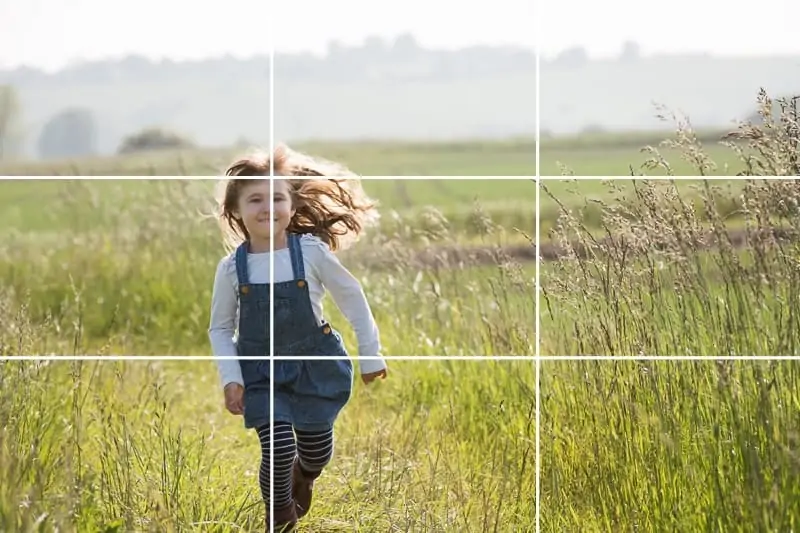
Rule of thirds
Multicam
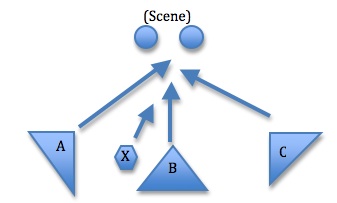
When you see the term ‘multicam’ used in video production it is referring to the use of multiple cameras recording a shot in unison. There are many advantages for this, including camera/audio failure, a bad shot – such as a talent blowing his nose, or simply to break up a monotonous take. Below shows how a scene would be recorded between one or two speakers and the angles the cameras should be arranged.
Camera Guides
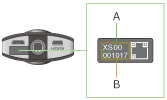
Sony Z90
Switching modes
Manual settings
JVC GY-HM200
Sony A7
Canon hf-g25
Lighting
What are the essential features and functions to consider when learning about video camera basics?
Hi there! Some key features:
– Understand frame rates
– How the exposure triangle will effect how you shoot
– Know the features of the camera you are using, including it’s manual and auto settings
– Different brands of cameras give you different colour profiles and setting names
– How to format memory cards
– Different shooting settings
– Do not neglect sound
– Know how to mic up speakers and montior for peaking/distortion & noise
– How lighting effects your shots more than the quality of camera you are using
– White balance
– Practise putting up tripods you have not used before, before you get on site
– Where possible scout where you are filming ahead of time to get an idea of sound levels, echoes and lighting expectations
– More than one camera as a back-up at important events is vital
There are many more, but these are a good few tips 🙂